Showing posts with label cheese. Show all posts

Thursday, August 23, 2012

Cornbread Skillet Casserole

Last week we made cornbread skillet casserole. I have been making variations of this dish since I was in high school. It is basically Mexican cornbread with hamburger meat. Start by browning some ground meat.
While the meat is cooking, coat the bottom of a large (10-12") cast iron skillet with oil and put it in a cold oven and heat to 375 degrees Fahrenheit.

Mix up the cornbread mixture and allow it to stand for as long as possible to rise.
Grate some cheese, and you're ready to assemble.
Carefully remove the skillet from the oven and place it on a heat-proof surface. Pour half of the cornbread mixture into the skillet, and top with meat, cheese, and jalapeno peppers. Pour the rest of the cornbread mixture over the top and smooth with a spatula.

Place the skillet back in the oven and bake for 35-40 minutes until the center is set and the top is golden brown. Cut into wedges and serve with guacamole, sour cream, hot sauce, salsa, or other desired toppings.
YUM!

Thursday, July 19, 2012

Cheesy Black Bean Dip

This is a quick throw together dip that always gets rave reviews. It's so easy and it tastes really good. I usually use black beans, but have used pinto beans also. I generally use Mexicorn in a can, but have used regular canned corn or even a cup or two of frozen corn. And just about any type of cheese will work.

Use one can of refried beans, one can of whole beans (drained and rinsed), one can of corn (drained), and 4 oz. (or more) of chopped or grated cheese. Feel free do add diced chilies of jalapenos, if you like your dip a little hotter.


Stir all ingredients together and cook on low in the crockpot until the cheese is melted. Serve with tortilla chips or fritos.

Leftovers can be reheated, or even better, spread on a tortilla and warmed in a skillet to make tostadas or quesadillas. Add extra cheese, sour cream, shredded lettuce, or other standard taco toppings.

Friday, July 6, 2012

Quick and Easy Quesadillas

Last night we had chicken quesadillas for dinner. This is the second or third time we've made them recently, and they are really good and easy to make. They start with Darren's chicken. He makes chicken enchiladas, and cooks the chicken in the crock pot with chicken broth, onion, chile powder, bay leaf, cayenne, black pepper, and cumin. I copied his chicken recipe for the quesadillas. Poke some holes in two chicken breasts and cook on low in the broth-seasonings mixture for 4-6 hours. Remove from the crock pot and chop or shred, as desired. [TIP: I have also used Italian seasoning mix to make chicken for pasta dishes, and the seasonings or spices could easily be adapted for all sorts of casseroles or dishes that require chopped, cooked chicken. We used to use those rotisserie chickens from the grocery store to short cut recipes, but this is just as easy, and much less greasy!]

Shred some cheese. We like pepper jack for Mexican and Tex-Mex dishes, but just about any smooth melting cheese will work. Then set up an assembly line! We have a griddle pan that covers two stove burners. I heated it up to medium heat, and lightly oiled it with cooking spray. Then I put down two tortillas flat on the griddle top, sprinkled them with cheese and chicken, and then folded them in half and let them cook a bit. Once they were folded, I moved them to the front half of the griddle and re-sprayed the back half with a touch of cooking spray. Then I added another tortilla to the back half, filled it, and flipped the quesadillas on the front of the griddle. Then I folded over the one on the back, removed the ones on the front to a plate, and moved the back to the front, and kept going. This method keeps things moving for me, and the quesadillas are ready fast. I usually move them onto a foil-lined baking sheet in the oven to keep them warm.

We ate these quesadillas with refried black beans from a can, and roasted corn guacamole that I made earlier in the afternoon. Yummy and easy!

Monday, June 11, 2012

Meal Plan Monday #1

We actually do our meal planning on Sunday and do all of the shopping for the week, but I like the alliteration of Meal Plan Monday. I started meal planning a few years ago after I got tired of throwing away spoiled, unused food. It was both a waste of money and resources. It took a while before Darren got on board, but we save money and food this way. 

We plan meals for Sunday through Thursday with a few staples like milk, cereal, turkey, fruit/vegetables, eggs, rice, and yogurt added on. We often cook four portions of dinner and eat leftovers for lunches. This isn't always possible, so the turkey is good for extra salads or sandwiches.

We usually eat fish or seafood on Sunday, so we can cook it the same day we buy it. I grew up close enough to the Gulf to know that you only get fresh seafood Tuesday through Saturday, but almost everything is previously frozen here, because we live in Arizona, so Sunday fish, it is! Salad or baked sandwiches are reserved for nights that we know one of us will be working late. Fridays are reserved for DATE NIGHT! And Saturdays are unpredictable because we are likely to be doing something with friends.

Sunday: Shrimp Boil (Shrimp, Corn, and Potatoes)

Monday: Buffalo Chicken Roll-ups (from Plain Chicken) with Sweet Potato Fries and Carrots and Celery

Tuesday: Peanut Noodles (Replacing the regular pasta with rice noodles)

Wednesday: Spicy Stuffed Peppers (Anaheim peppers with a filling based on this recipe)

Thursday: Darren's Enchiladas with Guacamole (He is now using shredded chicken cooked in the crockpot)

Friday: Date Night! (Darren's Pick)

Saturday, September 10, 2011

And we're back - Lasagna Primavera

After moving and starting a new job, I am finally back. I hope I'll be able to keep up with the blog on a more regular basis, but Darren has been cooking some and hasn't been posting his kitchen adventures either. Today we made sangria, bean dip, and a giant cookie. Hopefully, we'll get around to posting those eventually, but today I'm posting a delicious lasagna primavera that I briefly mentioned in the first post on our blog.

I changed the recipe very little, using two 12 oz. packages of spinach, adding some fresh squash and zucchini from Darren's grandmother's garden, and omitting the peas. It is great, but it makes a lot. I think next time, I will make it in two 8x8 pans and freeze half for later. It is a little labor intensive, so it would be nice to enjoy it a second time without all of the work!

I started by slicing all of the vegetables, grating the mozzarella, and mixing up the ricotta mixture.


Then I started working on the sauce by cooking a little garlic in some olive oil. I cheat and use that stuff in the jar that's already chopped.

Then I add the flour, whisk in the milk, and cook the sauce until thick.
Once the sauce is thick and bubbly, I remove it from the heat and stir in the veggies.
Then I prepare my pan with some non-stick spray and start with a thin layer of sauce.

Then I build up the layers with noodles, sauce, noodles, cheeses, noodles, sauce, noodles, cheeses. Mmmmm... it looks good already!


Then I baked it according to the directions and had a feast! It is actually better on the second or third day, so I will definitely see what freezing adds to the mix next time I make it. Eat up!

Saturday, April 30, 2011

Hash Browns from Scratch

I tend to make most of my baked goods from scratch. It's weird because people always seem impressed by this, but I think it's nearly as easy, usually less expensive, and much, much tastier to make things from scratch than to make them from a boxed mix. However, I usually use frozen shredded or chopped potatoes for hash browns. Not so today! I got out the mandoline and shredded a few potatoes.

My mandoline was a gift from Darren's stepfather. He got one for me and one for Darren's mom. I LOVE it and use it often (THANKS!), while Darren's mom is not a fan of hers. Any one out there got an opinion on a mandoline? My mandoline has a permanent diagonal blade and a rotating part that switches among thick slices, thin slices, large julienne, and small julienne. I used the small julienne setting for these hash browns.
The internet tells me that the secret to crispy hash browns is dry potatoes. Different sites suggest different methods, so I am going to go with my instincts and a combination of how my mom makes homemade french fries.

Prepare a bowl with cool water and a generous pinch of salt. Julienne the potatoes and put the slivers in the water to soak for 10-15 minutes.
Drain the potatoes through a fine colander, shaking out as much water as possible. Place the potato shreds on a kitchen towel (I am using my spinach towel), and fold/wrap/bundle them inside. Wring or press out as much water as possible.
Fold the towel a different way, and wring out some more water. Now you're ready to cook those hashbrowns.
Preheat the griddle to medium heat and coat it with a thin layer of oil. Just use a large skillet, if you don't have a griddle.
Add the potatoes in a layer. I tried making little bunches like they do at Waffle House, but I failed miserably.
Cook the potatoes for 4-5 minutes until beginning to brown and then flip. Season with salt, pepper, and desired spices. I used salt, pepper, paprika, and crushed red pepper. Repeat this process 3-5 times until the potato shreds and all done and a fair amount are nicely browned.
If desired, sprinkle cheese on top and allow to melt.
Serve alone or with sausage, eggs, and biscuits. Yum yum, gimme some!
If you try these hash browns, leave a comment and let us know how they turn out.

Tuesday, April 26, 2011

Ricotta Pasta

I made this last night for dinner. It is a super fast meal that tastes good. It is actually based on the filling of a recipe for stuffed shells with alfredo sauce. I can't find the original right now, but maybe one day I will make it again and post it. Until then, here is my weekday short cut.


You will need:
1 lb. pasta
15 oz. container of ricotta (I use low fat, but part-skim or whole milk will work, too).
10 oz. box or 12 oz. bag of frozen spinach
crushed red pepper
salt
pepper
nutmeg
parmesan cheese


Thaw the spinach and ring out as much water as possible using a kitchen towel. I use one I don't like that has some ugly chickens on it.
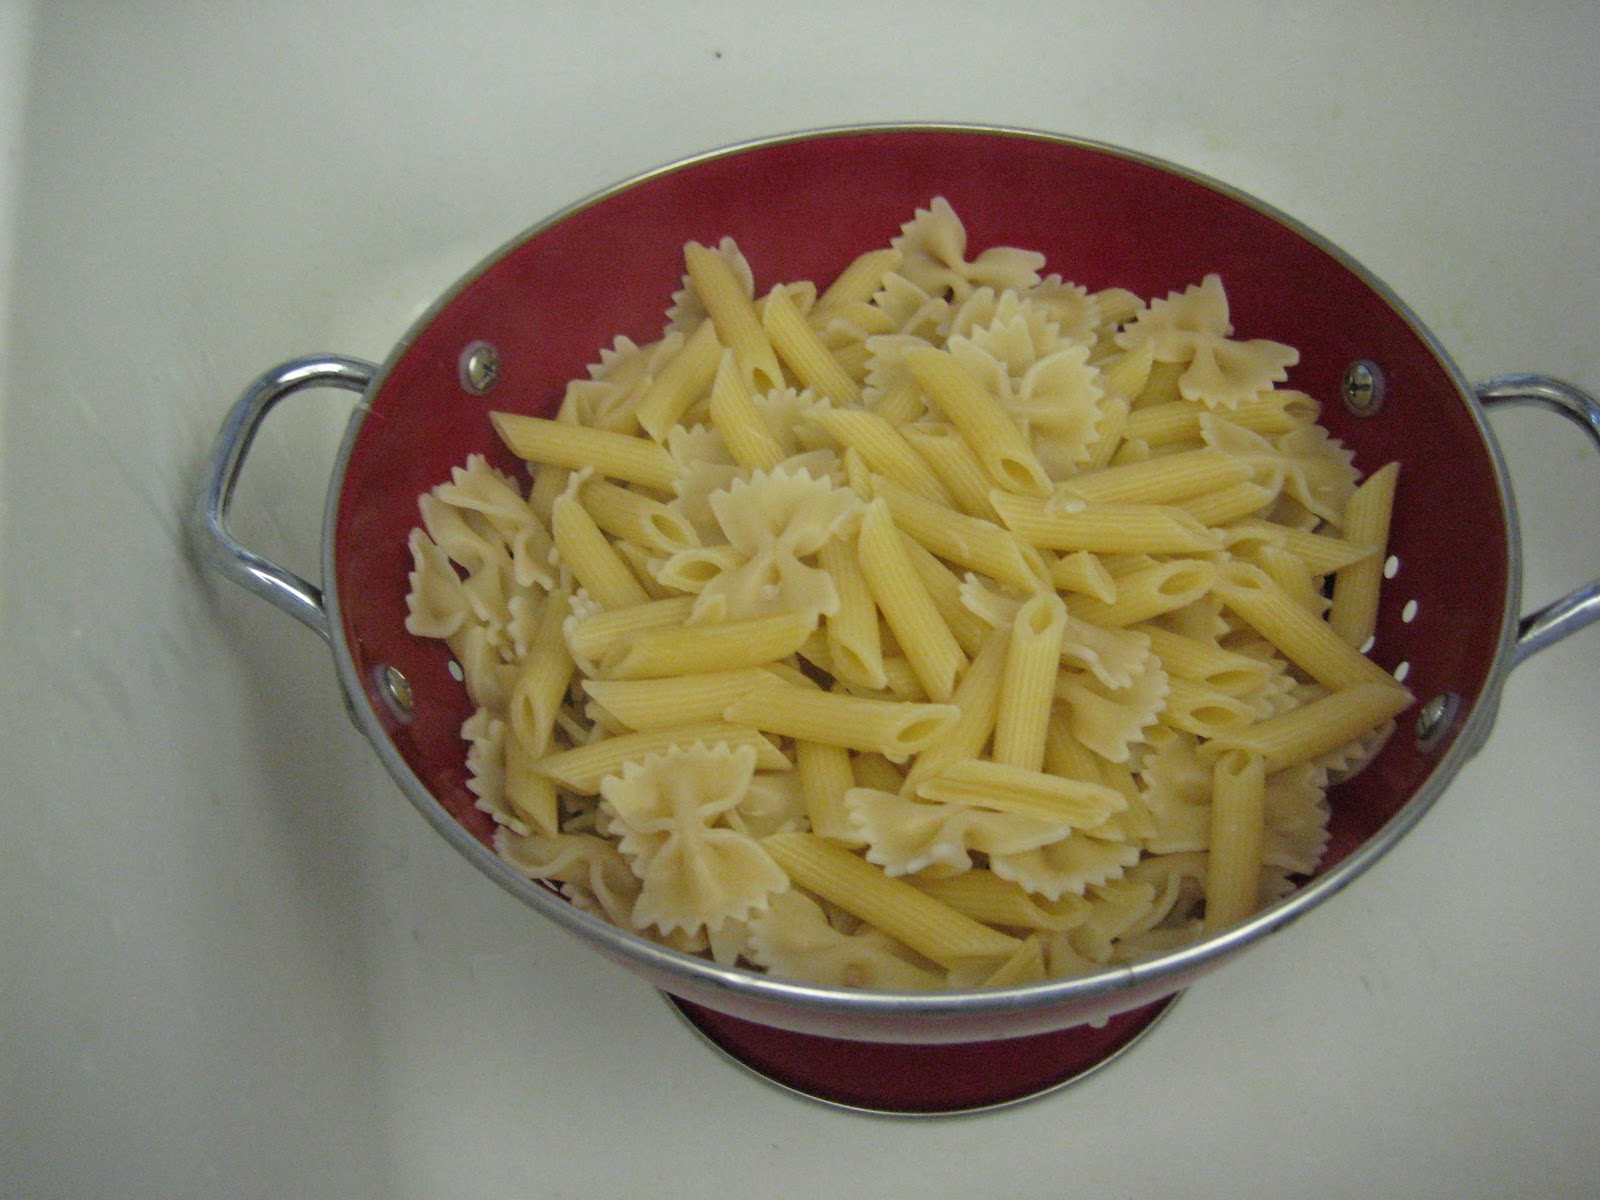
Cook the pasta according to the package directions. I used a half box of bowties and a half box of penne.
Drain the pasta and mix with the container of ricotta.
In a medium sauce pan, melt the butter.
Add some red pepper, and stir constantly until the fragrance comes out.
Add the spinach and heat through. Season with salt, pepper, and nutmeg to taste.
Mix the spinach into the pasta-ricotta mixture. Sprinkle a little parmesan on top, and it's time for dinner!
Want a printable recipe?

Wednesday, April 20, 2011

Green Chili Chicken Enchiladas

Lib and I have a really interesting story. I'm part Asian and from the southwest, she's from the south, but we met in the northeast. As a result, we have a pretty eclectic set of recipes (though most involve bacon). This one started as a much different beast in a Rachael Ray cookbook that I got for Christmas a few years ago. I unwrapped it shortly after telling the gifters that I'm not a fan of Rachael Ray. Oops!

At any rate, it has evolved over the years for a couple of reasons. Mainly, I wanted it to be less trouble and more delicious. I think we've achieved both of those goals. 30 Minute Meals my butt.

Like a lot of our recipes, this one is approximate, because we don't really measure. As usual, add or subtract amounts of the ingredients to your taste.

1/2 of a rotisserie chicken, pulled apart
2-3 dollops of sour cream (roughly 2/3 cup)
1 16 oz. jar of green sauce
1 lb of pepper jack cheese
12 corn tortillas

First off, preheat the oven to 350 degrees Fahrenheit. To make the filling, combine the chicken with the sour cream, half of the green sauce, and half of the cheese. With two forks, stir/shred the chicken and make sure it is sufficiently coated with delicious dairy goop.

That's just the cheese that didn't go into the filling.

Coat a 9x13 pan with cooking spray, then start rolling the filling up in the tortillas! It helps to have room temperature tortillas, as cold ones tend to crack. I like to place them with the seam down so they don't unroll.

You'll want to pack them pretty closely together in order to fit all twelve into the pan.

Lib asked me why I don't just make two rows of six. It was something I just always did, and I had forgotten why until just now. I made these for a potluck one time, where the vertical enchiladas had chicken and the horizontal ones were straight cheese for the vegetarians in the group. Sorry vegans, you get no dairy-free enchiladas from me.

After they are arranged in the pan, pour the rest of the green sauce on top.

Spread it as evenly as you can. Any piece of tortilla that doesn't get soaked with sauce may end up hard and chewy after it comes out of the oven.

Sprinkle the rest of the cheese on top.

Oh yeah, that's the stuff.

Put it in the oven for twenty minutes, then take it out and serve it. As you can see at the top of this post, we served ours with guacamole, but I wouldn't be against serving with refried beans, more sour cream, bacon, or nothing at all.

Get yourself a copy of the recipe!